Blast from the past: originally published May 3rd, 2002.
Once you have a small business up and running with a handful of computers you have to look at a serious backup strategy. Programs can be reinstalled, updates downloaded again, but the data generated by yourself and those around you is unique and should be protected. The best way to protect that information is to store it centrally and perform regular backups. To accomplish our goal we’ll look at both ends of the process; setting up the server and setting up the clients.
Let’s take a step back and look at the server. Every business with multiple users, big or small, should have a dedicated server. A separate machine that shares files, printers, internet access, email, intranet pages, etc. The two most common operating systems for a server are Linux and Windows NT or 2000. Our process here is generic and will work with either. As well all machines, server and clients, should have anti-virus software and the latest virus signature updates.
Our first step is to set up a bunch of folders ( directories ) on the server; one common folder with access for all users and individual user folders with restricted access. Every user on your network should have their own login and password, so permissions can be set on folders to limit access on the network. All users on your network ( remove “everyone” access if there ) have access to a common folder, so documents can be shared and worked on collaboratively. I usually call the folder common or company and share the folder on the network with the same name.
Each user has a folder created for them as well, with access restricted to that user and the administrator. That way a level of privacy and security can be maintained for the individuals’ documents. This folder can be named the same as the users login, typically first initial and last name, and shared with the same name followed by a $ sign. Adding the $ at the end of the share lets the server know to hide this share, so those browsing the network through Network Neighborhood won’t see them.
To make sure these two shares are available to users at all times you can run a batch file when they log in. This option is found under the user’s properties. Here’s a typical instruction for Windows PCs:
@echo off
net use X: \servercommon
net use Y: \serveruser$
Use Notepad or any text editor to enter the save it as a *.bat file. The net command has been built into every Windows version since 3.11 so this will work. It tells the operating system to map the common folder to drive X and the user’s private folder to drive Y. Simple and straightforward. Through this file you can also copy over virus signatures, flash messages and perform general PC “housekeeping”.
Moving on to the client PCs, we want to set them up to use only their network drive for saving files. If we keep all data on the server and back it up nightly, everything is safe.
This is a two-step process: make the software use the network drive as the default location and keep reminding the users to only save software on their “personal and private” drives. Since Windows 98 you have been able to specify the location of the My Documents folder. Right-click on My Documents, select properties and under Target enter the drive letter of the users’ private share. This will take care of all applications that are certified for the OS, such as Microsoft Office. For others, you’ll have to set the default directory through the application’s options or preferences menu. This will also have to be done for every application if you’re still using Windows 95. Microsoft Office users can take advantage of the Office Profile Wizard to backup all their customizations of the office suite.
This takes care of most files, but doesn’t include email applications. Microsoft Outlook is the most common email application and saves everything into one *.pst file. The location of the file varies by operating system, but can be found by searching for it. The safest option is to move the user’s *.pst file to their network share. This method varies on every version of Outlook, but can be found by hunting in the Options menu or by right-clicking on Personal Folders and selecting Properties. A surefire method is to locate the *.pst file and copy it to the network share. When Outlook is opened the next time it will indicate the pst file cannot be located; you then browse for the file and everything’s good to go.
Other email applications vary in how they store files, generally spreading them across multiple files. For Outlook Express backup and restore check out this excellent site.
Laptop users need another option, as the machine isn’t always connected to the network. The best practice for them is to store all their documents in the c:\My Documents folder and synchronize with the server when they log in. Here’s how to set up their login file:
@echo off
net use X: \servercommon
net use Y: \serveruser$
xcopy “C:\My Documents*.*” “Y:\My Documents” /M /E /Y
This is the same as our first file but with the xcopy command added. This line is copying all files from the C: drive of the laptop or local computer to the user’s My Documents folder on the network share. It will be annoying when they connect to the network but will keep the data safe. The end switches are as follows: /M copies only files with the archive attribute set and then turns off the attribute, /E copies all subdirectories and files, /Y indicated yes to overwriting files with the same name. The last two are pretty straightforward, so let’s talk about the archive attribute. Each file has an attribute called archive that can be on or off. Most applications can turn this on or off, including basic DOS commands, Windows Explorer, even File Manager from Windows 3. The concept here is once the file has been copied over the archive attribute is set to off. When the file is worked on and saved it’s automatically turned back on. When xcopy is run again it only looks for files with archive on and leaves the others that haven’t been worked on since the last backup. Quick and easy.
Now we have basic file protection set up through shares on the server and users storing all documents in those shares. Our second backup script will protect machines that infrequently access the network by copying their documents when they do connect. Now our only concern is keeping the documents on the server backed up and secure. I’d like to believe that anyone who sold you a small business server included a tape drive in that machine, but this isn’t always the case. Recommended is a twofold backup strategy; RAID 1 mirroring of hard drives and tape backup for archiving.
RAID stands for redundant array of independent drives, and type 1 keeps a mirror image of one hard drive on a second hard drive. This can be accomplished via software to save money with lenders for quick funds via hardware for speed and operating system independence. This way if one hard drive fails the second mirror image has all your data, safe and secure.
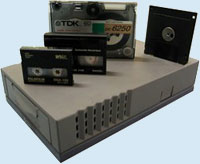
To archive all documents you need large capacity removable storage. If your data is less than 4.7 GB I heartily recommend a DVD writer. Less than $600 for the drive and $20 per rewritable disc means you can have a fast backup and one month archive for $1000. If your data goes beyond that size a tape drive is your best choice. Ranging from 8 to 100 GB per tape it’s the way to go. Check our tape technology [intlink id=”2314″ type=”post”]comparison[/intlink] for more information. The built-in backup software in any server OS can be used to archive your data files. If you want “disaster recovery”, which means you boot from a disk and reload your entire system from tape, you’ll need additional software. It’s a good idea with any backup media to take a copy home with you, just in case the building is destroyed.
The focus of this article is keeping user data safe and sound. Combine the few simple procedures and all your business data will be safe.


