I’ve been looking after the back-end of Comic Book Daily, a website running on WordPress. This is a comic book website so it’s very visual: one of the things people want is a lot of images. For this we’re using jQuery Colorbox to make the images pop out of the site; to work effectively and have the image fit without scrolling in the bulk of web browsers we resize the image to a maximum of 800 pixels. Resizing also allows for fast loading and reduced space on our web hosting.
For some, this is a task outside their comfort range so I’m presenting this simple tutorial using GIMP. GIMP is an open-source free image editing program that will run on many operating systems. I’m going to assume basic familiarity with finding the program, finding things on a program menu and opening files.
Start GIMP, go to FILE, OPEN, and find your image.
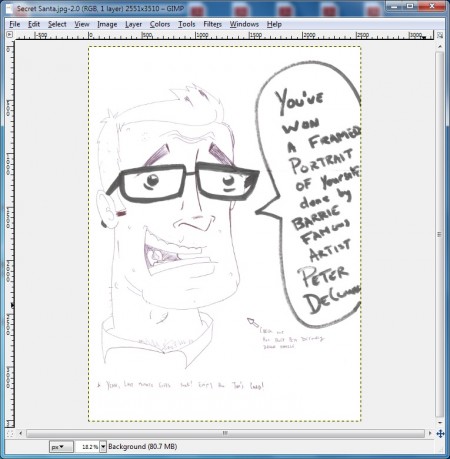
A few things to note once the image is open: at the top of the program is the file name and its current size, 2551×3510. Now we want to resize: go to IMAGE, SCALE IMAGE.
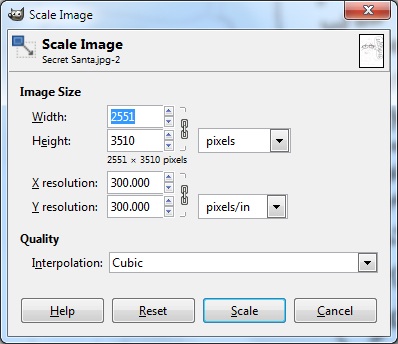
Here we have the image size in pixels and pixels/in: we want to work with the first one, Image Size Width Height in pixels. Note the chain link: that means the aspect ratio will be maintained when you change one of the values, change one and the other adjusts automatically. We want to have a maximum pixel size of 800 so that means for this image I’d change the height to 800 since that’s the larger of the two.
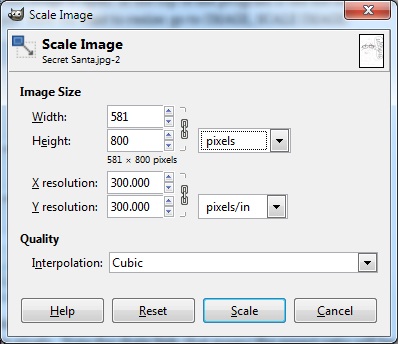
Note how the width adjusted when I set the height to 800 pixels. Click Scale to complete. Now we have to save the image: go to FILE, SAVE and it will automatically save the image at the new resolution. If you want to keep the original use FILE, SAVE AS instead. Your image is now significantly smaller and web-friendly.


